How to add a reading time to your squarespace blog (3 Placements)
Reading time is one of the smallest additions you can make to a blog post and one of the most effective for keeping readers from bouncing. When someone lands on your post and sees "7 MIN READ," they make an instant decision: bookmark it for later, skim it now, or commit. Without that signal, they're guessing and guessing leads to leaving.
This guide covers three placements: the individual blog post, the blog overview page, and summary blocks. All three use simple JavaScript snippets you paste into Squarespace's Code Injection. No plugins, no third-party tools.
What You'll Need
Access to Website > Custom Code > Code Injection in your Squarespace dashboard. That's it.
Placement 01 : Individual Blog Posts
This snippet calculates your post's word count, divides it by a 228 words-per-minute reading speed, and injects the result directly under your blog post title.
Paste this into the Header section of Code Injection:
<!-- sqspguru.com | Read Time: Blog Post -->
<script src="https://ajax.googleapis.com/ajax/libs/jquery/3.4.1/jquery.min.js"></script>
<script>
var READ_LABEL=" MIN READ";
$(function(){
var words=0;
$("article .sqs-html-content").each(function(){
words+=$(this).text().replace(/[^\w ]/g,"").split(/\s+/).length;
});
var mins=Math.floor(words/228)+1;
$("article .blog-item-title").append('<span class="reading-time">'+mins+READ_LABEL+'</span>');
});
</script>
<!-- sqspguru.com | Read Time: Blog Post -->
What's happening here:
words / 228 divides total words by average reading speed
Math.floor(...) + 1 rounds down and adds 1 to avoid showing "0 MIN READ" on short posts
Want to change the label? Just edit READ_LABEL on line 1. That's the only line you need to touch
Styling the Read Time
Add this to Custom Code > Custom CSS to style the output:
.reading-time {
  color: #888888;
  font-size: 14px;
  font-family: inherit;
  text-transform: uppercase;
  letter-spacing: 0.05em;
}
Swap the color and font-family values to match your site's design system. The .reading-time class is injected automatically by each snippet so no changes are needed in your template.
Placement 2: Blog Overview Page
Want readers to see estimated read times before clicking into a post? This snippet loops through every post on your overview page, fetches each post's content, calculates the reading time, and injects it under the post metadata.
Paste this into the Header section of Code Injection, directly below the first snippet:
<!-- sqspguru.com | Read Time: Blog Overview Page -->
<script>
var READ_LABEL=" MIN READ";
$(function(){
$(".blog-item").each(function(){
var item=$(this),url=item.find("a").attr("href");
$.get(url,function(data){
var words=$(data).find("article").text().replace(/[^\w ]/g,"").split(/\s+/).length;
var mins=Math.ceil(words/228/2);
item.find(".blog-meta-section").append("<span class='reading-time'>"+mins+READ_LABEL+"</span>");
});
});
});
</script>
<!-- sqspguru.com | Read Time: Blog Overview Page -->
This makes the menu panel take up the right half of the screen on anything wider than 767px, with a soft drop shadow to separate it visually from the page content behind it.
Placement 3: Summary Blocks
If you use Squarespace's Summary Block to display blog posts anywhere on your site, a homepage feed, a category section, or a sidebar, this snippet adds reading times there too.
Paste this into the Header section of Code Injection, below the previous snippets:
<!-- sqspguru.com | Read Time: Summary block -->
<script>
var READ_LABEL=" MIN READ";
$(function(){
$(".summary-item").each(function(){
var item=$(this),url=item.find("a").attr("href");
$.get(url,function(data){
var words=$(data).find("article").text().replace(/[^\w ]/g,"").split(/\s+/).length;
var mins=Math.ceil(words/228/2);
item.find(".summary-metadata-container").append("<span class='reading-time'>"+mins+READ_LABEL+"</span>");
});
});
});
</script>
<!-- sqspguru.com | Read Time: Summary block -->
Taking It Further: Add an Icon
Want to take it one step further? You can add a small clock icon before the read time text using nothing but CSS. No extra JavaScript needed.
Step 1: Get Your Icon
You have two options here. The quickest is to search for a clock icon on Google Images or a free icon site like SVG Repo or Flaticon and download it as an SVG or PNG. If you use Figma, the Iconify plugin has hundreds of clean options you can export in seconds.
Either way, resize your icon to 16x16px and make sure the color matches your read time text. That keeps everything visually consistent without any extra effort.
Step 2: Upload Your Icon to Squarespace
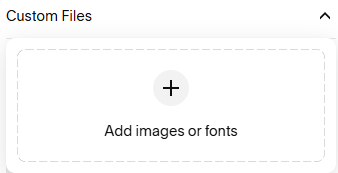
Go to Custom Code > Custom CSS and look for the Custom Files option in the bottom left of the panel. Click Add Images or Fonts and upload your icon file. Once uploaded, click the file to copy its URL. You will need this in the next step.
Step 3: Add the CSS
Paste this into Custom Code > Custom CSS, replacing YOUR-URL-HERE with the icon URL you copied:
.reading-time:before {
  content: "";
  display: inline-block;
  background-image: url(YOUR-URL-HERE);
  background-repeat: no-repeat;
  background-size: 16px;
  width: 16px;
  height: 16px;
  margin-right: 5px;
  margin-bottom: -2px;
}
The margin-bottom: -2px handles vertical alignment with the text. If your icon sits slightly high or low, nudge that value up or down by 1px until it lines up.
Troubleshooting
Icon is not showing up. Double check that the URL inside url(...) is complete and has no extra spaces or missing characters. Copy it fresh from Custom Files if needed.
Icon is misaligned with the text. Adjust margin-bottom in small increments. Values between -4px and 2px cover most cases depending on your font and line height.
Icon color does not match. If you are using an SVG, make sure the fill color is set before uploading. Squarespace Custom CSS cannot recolor uploaded image files directly.
Final Result
Once saved, every blog post will display an estimated read time directly below the title. Visitors on your overview page and any Summary Block will see the read time alongside each post card without clicking into the post. Change READ_LABEL at any time to update the label across all three placements at once. If you completed the icon steps, a small clock icon will sit neatly to the left of the read time on every placement automatically.